
Category:
3D
Date:

For my first exercise in MMD60804 3D Modeling, the task was to build a recognisable everyday object using primitive shapes. The model needed at least five objects and three different primitive types, with realistic proportions, clear object names, and applied scales.
I chose a toy car because its main features could be represented using cubes, cylinders, and spheres. This reflection explains the construction process and what I learned from reviewing the result.
1. Breaking the Object into Simple Shapes
The first step was to think about the car as a collection of basic forms:
Car component | Primitive | Quantity |
|---|---|---|
Body, cabin, and roof | Cube | 3 |
Front and rear bumpers | Cube | 2 |
Rear lights | Cube | 2 |
Wheels and wheel hubs | Cylinder | 8 |
Headlights | UV sphere | 2 |
Total | 3 primitive types | 17 objects |
This helped me understand the purpose of blocking: establishing the overall shape and proportions before adding detail. Even without complex modelling techniques, the arrangement of simple shapes can communicate what an object is.
2. Setting the Scale
The scene used metric units to keep the dimensions believable. The car body measured 24 cm long and 12 cm wide, and the complete model was approximately 26 cm long, including its bumpers.
Working at this size gave the model a clear identity as a toy car. It also showed me why checking dimensions is more reliable than judging size from the viewport alone.
3. Building the Body, Cabin, and Roof
The largest shape was the body, made from a cube scaled into a rectangular block. A smaller cube formed the cabin, with a thin cube placed above it as the roof.
The cabin sat directly on the body, and the roof slightly overhung the cabin. These simple relationships made the silhouette recognisable while keeping the construction within the primitive-only rules.

4. Adding the Wheels and Hubs
Four cylinders formed the wheels. Each wheel had a 7 cm diameter and was rotated 90° around the Y-axis so its axle ran across the car.
The wheel positions were mirrored across the body, with equal spacing between the front and rear pairs. Smaller cylinders formed the hubs.
This stage highlighted the importance of accurate placement. Consistent wheel sizes and positions made the model look balanced, while matching the wheel centre height to its radius placed the tyres at ground level.
5. Adding the Lights and Bumpers
Two flattened UV spheres formed the headlights, introducing the third required primitive type. Small cubes became the rear lights, and two wider cubes formed the bumpers.
These additions helped distinguish the front from the back. Viewport colours also separated the red body, blue cabin, dark wheels, and lighter hubs and bumpers.
6. Organising the Scene
All 17 objects received descriptive names, such as car_body, wheel_front_left, and headlight_right. They were grouped into one collection called Car along side a Road Collection.
Each object’s scale was applied so its scale values were 1, 1, 1. The model used no modifiers, extrusion, loop cuts, sculpting, or polygon editing.
I learned that scene organisation is part of completing a model. Clear names make it easier to select, inspect, and change individual parts later.
7. Checking and Presenting the Model
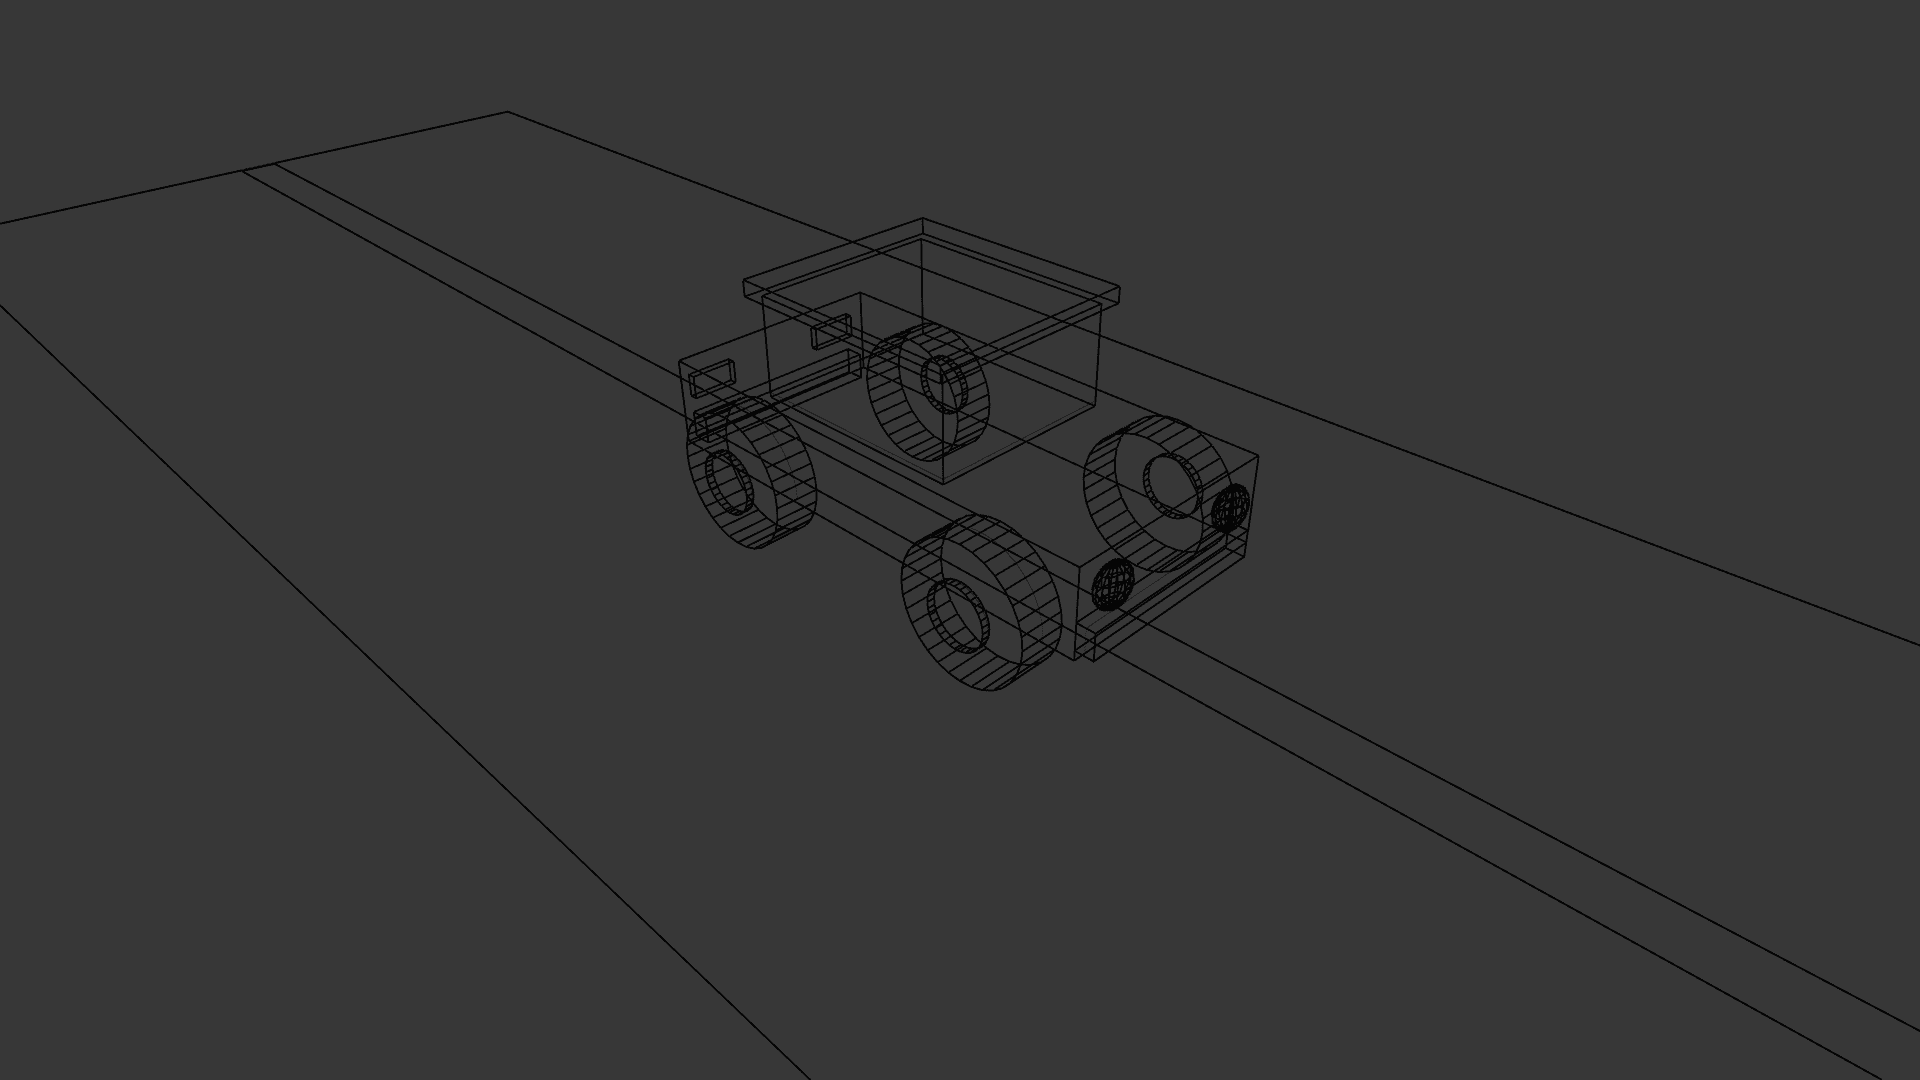
The finished car was checked from the front, side, and a three-quarter perspective. A wireframe view showed the separate primitive shapes used in its construction.
Four viewport images were exported at 1920 × 1080 pixels:
Front view
Side view
Three-quarter perspective
Wireframe view

Reflection
The strongest part of the result is its recognisable silhouette. The body, cabin, wheels, and headlights communicate “toy car” without requiring complex geometry. The model also meets the required primitive count, with clearly named objects and applied scales.
The main lesson for me was that proportion and placement matter more than detail during blocking. Simple shapes can create a convincing object when their sizes and positions work together. Checking the model from different views also helped me understand how a single perspective can hide alignment issues.
An area I want to improve is my confidence with Blender’s Move, Rotate, and Scale tools. I plan to practise positioning objects accurately, duplicating parts consistently, and checking dimensions throughout the modelling process.
This exercise helped me understand how everyday objects can be broken down into basic shapes. It gave me a foundation for approaching more complex models while keeping proportions, alignment, and scene organisation in mind.

